July 28, 2012

Don Ray, Reclamation

      Sis and I went to an estate sale recently, and I found an Don Ray pen and ink drawing. Don Ray was a Texas artist that was noted for painting western themes and landscapes, who passed away in 2006.
     This was not a purchase; it was a rescue. I found the drawing neglected and grimy with a healthy colony of black mold growing behind the glass. Originally, the drawing was framed in a simple black picture frame under glass with a white mat.Very pretty it must have been; but now, the drawing has yellowed and foxing had occurred. I still would like to display the piece. My cleaning amounted to throwing away the mat and cardboard backing and dabbing the picture with alcohol.
     Using the materials that I already have on hand, I cut a new mat and covered it with fabric making sure that I used a color close to the yellowed drawing.

     After sanding the picture frame, I took it outside and sprayed it with brown Rust-Oleum. And just as the paint began to tack up, I burnished the frame with crumpled gold foil. You can, also, let the paint dry then size the frame and add your foil for a more even look. But I wanted a more sketchy look, so I skipped a step. 

1                                                      2
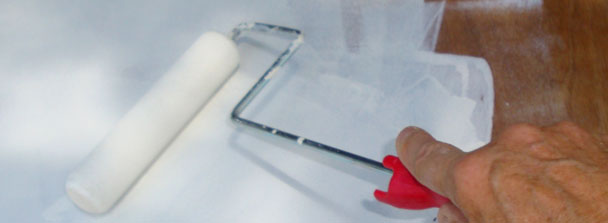
     1) I would like to create a weathered wood look to the frame, so I applied plaster around the inset of the molding. 
     2) After the plaster dried, I sanded back until I was satisfied with it leaving a little of the gold, cowboy-glam background peeking through. Then I sealed it with Polycrylic.
3                                                   4
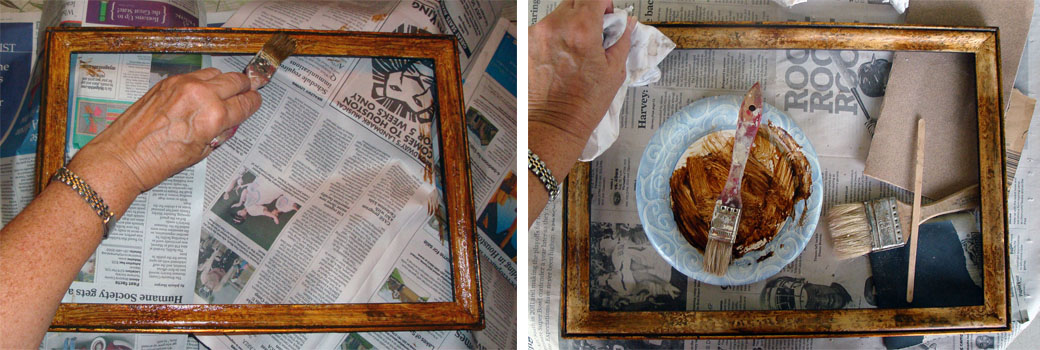
     3) After the sealer dried, I stained the molding with a water based stain. 
     4) Then, I wiped the stain back to where I felt happy with it. 


And here is the outcome...rustic. 

And here is what it looks like finished. 

     Actually, the picture and frame looked nice at the rustic stage, but I couldn't resist adding some knots and some wood texture to the frame.
     I think Don Ray would approve. I asked, but I only heard from someone named Houdini.


July 18, 2012

Painted Cedar Chest, Completed

Drum roll, please........ 
  To view the before pictures, please go here. 
Yes, finished, but the major steps in getting here were:
Finishing the shield
Glazing the body of the chest
      We used Metal Glow's Pirates Gold as a base coat. Then we mixed Mixol pigments (Rehbraun #3, and Umbra #2) in Perfetto glaze for the translucency of color, and we built up the color in two passes after letting the first pass dry completely. 
 Sealing the chest
     We chose to seal the chest with Faux Effects' Varnish Plus in a satin finish. Although very durable, it is not necessarily a better product than other acrylic topcoats. However, when dry it has a very satiny-tactile feel to it that many others do not have. 
     If you choose to use this product for the first time on one of your projects that has hand painting or glazing done in latex or acrylic, you must first seal your art work before you topcoat with Varnish Plus because VP will cut right through your work, and you will end up with mess on your hands. Although you can brush this top coat on and lightly sand between coats, it is a lot easier to spray.

     This was a fun project....We hate to see it come to an end. You know what would be really pretty for a more feminine feel: do the embossing of the crocodile stencil as an all-over-stencil design; paint the piece pure white with little or no glazing; and add faux straps with pewter or bronze nail heads.....Now, that I'm thinking about it, Michelle Delgado from Wonder Faux carries some really pretty nail heads.......humm. 


June 25, 2012

Painted Cedar Chest, Cont., Continued


   Did I mention that there was a heraldic shield going on the top of the chest?  With a few minor changes, this is the progress; or for me, more fun stuff. 

Transferring image to the top of primed chest. 

Blocking in color.

Adding metallic gold and silver paint.  

A few more brush strokes.

Almost done.

June 7, 2012

Painted Cedar Chest, continued

        We have the chest primed and ready.....now, for the fun stuff. After samples were made and a drawing of the family shield was finished, and since the guys in the family were the primary users of the chest, the client wanted a more masculine design. It was decided that the top of the chest will have the family shield painted on a background of solid chocolate. While the belly of the chest will have an embossed alligator finish.


 We are using a stencil (Faux Effects International, Crocodile stencil) and a plaster (Faux Effects,Venetian Gem). The stencil has register marks, so we simply match up the registration marks while blading the plaster evenly through the stencil.....And Ta da, the embossed section of the chest is finished. The tape is removed, and the plaster is left to set up for a few days....Then comes more fun.


June 3, 2012

Painted Cedar Chest

     This is a fun project that Sis and I are working on. A client wants a cedar chest painted. None of us are quite sure how old it may be, but we are guessing that it was made around the thirties or forties. It has a few issues: peeling veneer, flecking shellac and numerous dings. But aside from that, it is in pretty good shape. 

     However, before the fun stuff can begin, we need to prepare the piece for painting. We felt that the bottom molding of the piece needed updating to take away the Art Deco feel, so we elected to replace it with simple 1"x4"s, which we routed the top edge with an ogee design and will cut a simple curve on the bottom. In the picture above, we have already installed a nailer piece on the bottom of the chest to accept the new molding.
 MITERING JOINTS
     In this project, it is not important to save the veneer; and where the veneer is peeling, we cut it out or chip the entire sheet off.
Now all that is left to do is the sanding......


                      and priming.


May 23, 2012

Shimek's Garden


     Nell and Harvey Shimek live in Alvin, Texas. Although they grow a multitude of plants, they are known for hybridizing and showing daylilies. Each spring at the height of the daylily bloom, they open their garden to the public. Last weekend, the Shimeks had at least an acre of daylilies that were in full bloom.        
     When most people think of daylilies, they think of the old-fashion  butter yellow ones. However, one glance at Shimek's garden, will quickly change your mind. Last weekend, you could find pale apricots, pretty pinks, and brilliant reds; single to triple blooms; and plants from dwarfs to tall spiders. Here is a quick glimpse......
    One of the best things about Shimek's open garden tour is that some of these plants can be yours. Because the Shimeks not only let you view their garden, you can buy plants too. They have people with shovels in hand waiting to help you. With an acre in bloom, the hardest part is picking out which ones you want to take home.

     The Shimeks have a passion for gardening and a willingness to share their knowledge. Their garden shows me what can be possible, not that I want two acres of daylilies. Although they have, no doubt, given away and sold daylilies far and wide, I think of the influence that they have had when I see daylilies putting on a show in the gardens around our area. I think that we are the fortunate ones.   ~Sandy~  

Shimek's Garden
3122 County Road 237
Alvin, TX 77511-8690
 281-331-4395

http://www.cityscope.net/~neshimek/


April 24, 2012

Marguerite Rogers House Museum's Garden Tour


 It must be spring (although someone living in Pennsylvania might disagree with me right now) because of all the home and garden tours that are taking place. So last weekend, Sis and I attended a local garden tour held in Alvin, Texas. The tour was for the benefit of the Marguerite Rogers House Museum, and it was held by the museum members in conjunction with the Alvin Garden Club.

MARGUERITE ROGERS HOUSE MUSEUM

      The home was built by John G. Slover, who was a carpenter by trade, and it took him from 1900 to 1909 to complete. I hate to admit it, but some of my simple DIY projects have taken longer. He also was very accomplished at creating gingerbread house molding, which he decorated his home with, inside and out.
   EARLY BAND SAW                                            MILLWORK                                                        HIS AND HERS                         

    From left to right, the first picture above shows an early router/band saw that Mr. Slover used to cut his millwork with; and the second picture shows some of his template designs pinned to the wall. I wonder what he would think of the computerized CNC routers that are used today to cut intricate designs in seconds. The third picture speaks for itself of changing times. I like the wallpaper. Not that long ago, some of the best family jokes were about outhouses. They always started with, "Do you remember the time when..." and ended in laughter. Although my experience is limited, I never feared the spiders. It was the snakes...... 
      The Alvin Garden Club held a plant sale at the museum. They offered many hard to find old-garden-varieties not necessarily offered by commercial growers.
     All day, the air carried the heavy scent of jasmine while the flowers put on a technicolor display as we toured from garden to garden. 
 It was a beautiful day for a garden tour. ~Sandy~

MARGURITE ROGERS HOUSE MUSEUM
113 EAST DUMBLE, ALVIN TEXAS

OPEN: THURSDAYS, FRIDAYS, FIRST SATURDAY OF EVERY MONTH from 11:00 to 3:00
281-585-2803